Wednesday, April 30, 2014

Triangle Quilt Along - (almost) Finished Top

I know I've been pretty flaky with posting the last two weeks.  Sorry!  Things have been very busy at work and I'm starting some new training so it's going to be even more hectic.  Read: Not much energy for sewing.  I do have a partial finish to share with you.  I've been steadily plugging away at my triangle quilt top at night; averaging one row a day.  I'm not going to finish in time for the big link-up party but I'm still really happy with what I've got so far and can't wait to get the whole thing finished.   Sorry in advance for the low quality pictures courtesy of my phone and instagram.

finally sewing rows together
I got to sewing the rows together this weekend and once I got the hang of it, it went pretty quickly.  It did still take me all of Saturday (and a glass of sangria) to finish sewing them together.  I am not a "pinner".  Instead I usually try to choose patterns that don't have any points to match! Is that cheating?  This quilt, however, required LOTS of pins: one at each intersection and one in the middle of each intersection for stability.  I did manage to only stab myself a handful of times!  Yay for the small wins.

nearly done
I laid the finished quilt top out on our queen size bed (the only surface in our house large enough) once I had it all complete.  I'm in love with the overall effect!  The only thing I'm not loving right now is that it's very long and skinny; longer than our bed but just barely wider than the top.  I'm thinking I'll remove 4 of the green/yellow rows and move them to the back of the quilt to help even out the odd dimensions.

(nearly) finished quilt top.
Originally I was thinking I would leave the pointed edges along the sides but at some point I realized that the rows point the same direction.  In other words I did an even number of blocks per row instead of a odd number.  So the ends of one row both angle the same direction.  I have a feeling this is going to drive me a little bit crazy so now I'm thinking I'll just trim them square.

spring flowers
This color palette has really been on my mind recently too.  I didn't realize until I got home that I purchased flowers in the same colors as my quilt top.  I'm linking up with this weeks WIP Wednesday over at Freshly Pieced.


Tuesday, April 22, 2014

Challenge Quilt Reveal

You may remember this post from way back on March 11th where I told you I had finished up my entry for my local quilt guild annual challenge.  I promised to share my finished quilt shortly.  Well low and behold, we got over two feet of snow the next day and our meeting was cancelled and the presentation of challenge quilts was postponed until our April meeting.  (interestingly enough, the same thing happened last year too....).  The guidelines were as follows for this years challenge:
Challenge Quilt for March 2014: The color of your Birthstone or Birth Flower
Make the quilt perimeter no larger than 240″ total. Suggestions or ideas (but not limited to) are: throw size quilt, wall hanging, baby quilt, jacket, bag or table runner, etc. The item needs to have the usual quilt construction, ie: 3 layers, with batting in the middle & quilted. The birthstone color and/ or birth flower must be listed on a tag on the front of the item for display. You can use just the birthstone color or just the birth flower color or both. Two other colors may be used in addition to the specific colors identified. There is a limit of 2 entries per member and they need to be completed. 
I am a November baby so my birthstone is topaz (I hated how ugly it was growing up) and my birth flower is the chrysanthemum (ever read the book Chrysanthemum, by Kevin Henkes about the mouse? My favorite!).  I decided to make a quilt inspired by both.

The center stone is the Shine Bright pattern from Sarah at {no} hats in the house.  I am huge fan of Sarah's work and am always inspired by what she makes.  The greatest thrill for me was when she saw what I was working on on Flickr and commented on how much she liked it!  Talk about a confidence boost!!  This was my first time sewing curved seams as well.  If I could go back and do it again I would add the background pieced to the center gem before sewing the gem together, but as it was, I had already removed all the papers and really didn't want to pick open all of those seams.  So I improvised.  I cut a circle out of the middle of my background fabric, slightly smaller than my gem, then pinned and sewed around the outside of the gem.  It got a little wonky; there are a few ripples in the background fabric, but overall it worked!


I quilted the background using the chrysanthemum quilting tutorial from Rachel at Stitched in Color using a dark red thread matched to the background color.  I'm also a huge fan of Rachel's work.  Her use of color is just amazing!


I did have some problems with tension while I was FMQ the flowers so the back of this quilt is pretty ugly.  A quick, last-minute fix meant it was ready to display for the guild meeting but really I should have gone back and ripped out all of the background quilting and re-done it.  Luckily this is a wall hanging, and we'll hopefully never see the back of the quilt.


I added a row of stripes to the top of the quilt, using up the oakshott cottons I had purchased for this project.  I feel like it added a bit more interest to an other wise simple quilt.  I also felt like it helped to show off the quilting a little more as well.


I stitched in the ditch of the gem stone, hoping to add some depth to the pattern without retracting from the overall design.  This was my first time doing straight(ish) line quilting with my free motion foot.  There are only a few minor deviations from straight so I'm really happy with the results.  I'll definitely be revisiting this technique in the future.  I also added some "sparkles" with my quilting and then sewed on some gold colored seed beads when I was finished to add to the shine of the gem.


Luckily I didn't win the challenge (I know you're saying "wait, what?!").  The winning quilters make up the body of the challenge quilt committee for next years challenge and with being President of the guild next year, I'm not sure I could have handled all that.  The winning quilts were fantastic though!

Don't these look just like daffodils?
Northern Lights inspired quilt
Thanks for stopping by and happy quilting!

Friday, April 18, 2014

Machine Quilters Exposition 2014 - Part 2

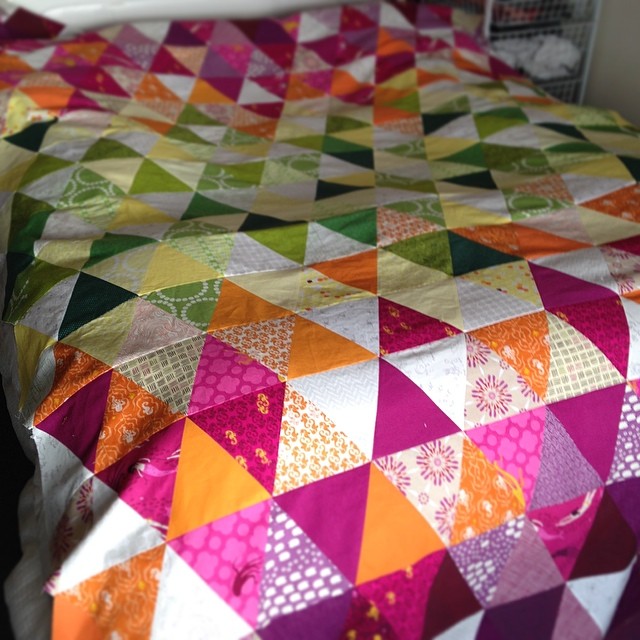
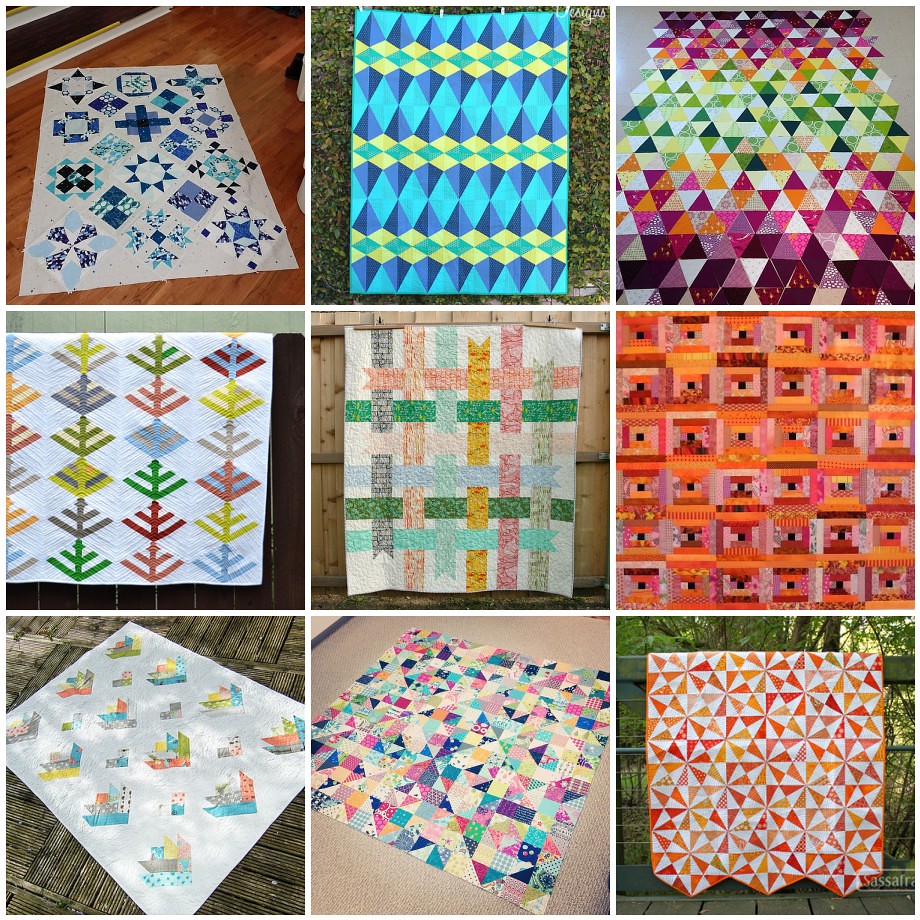
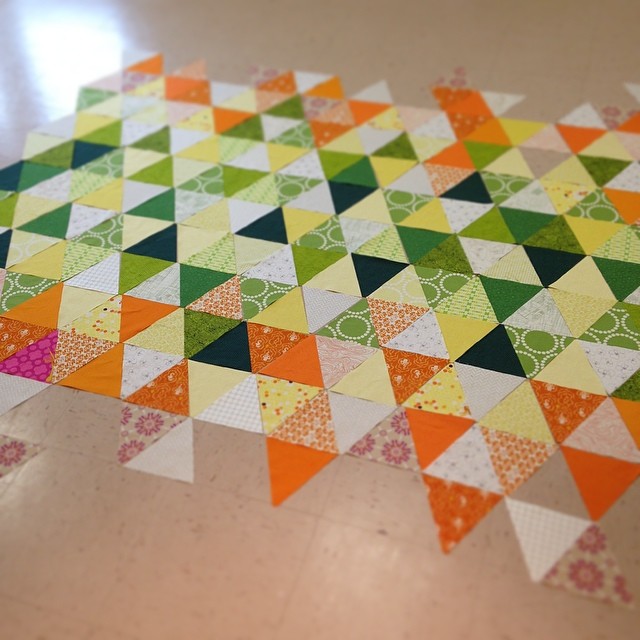
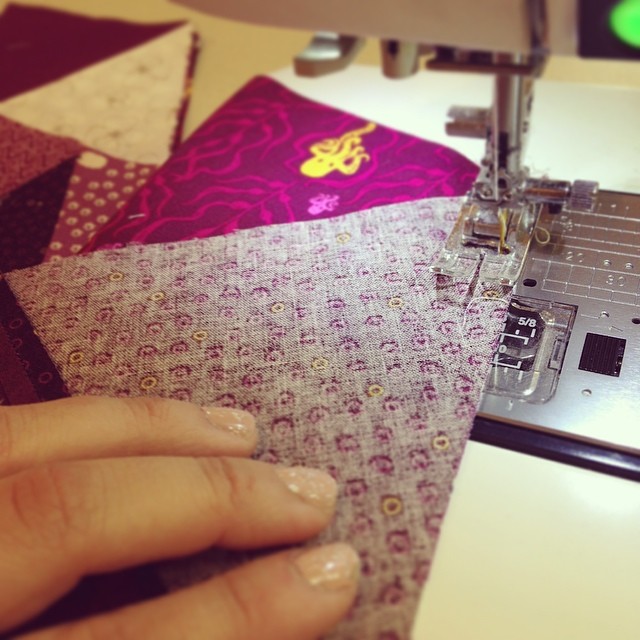
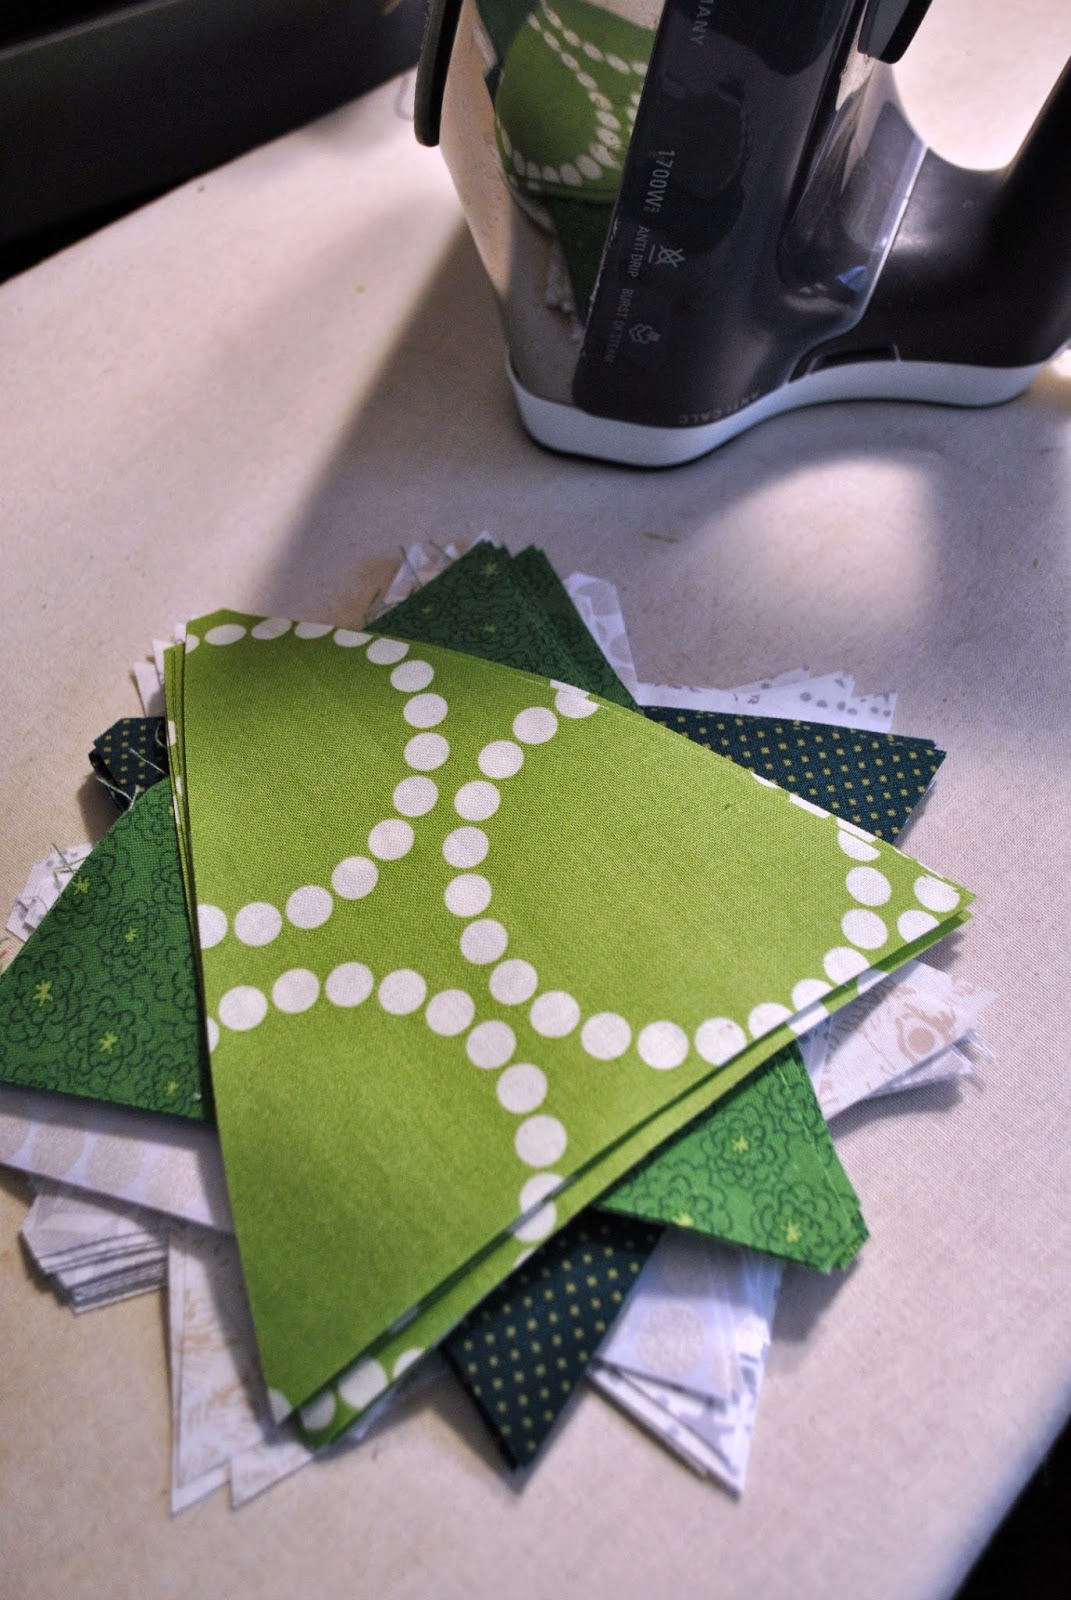
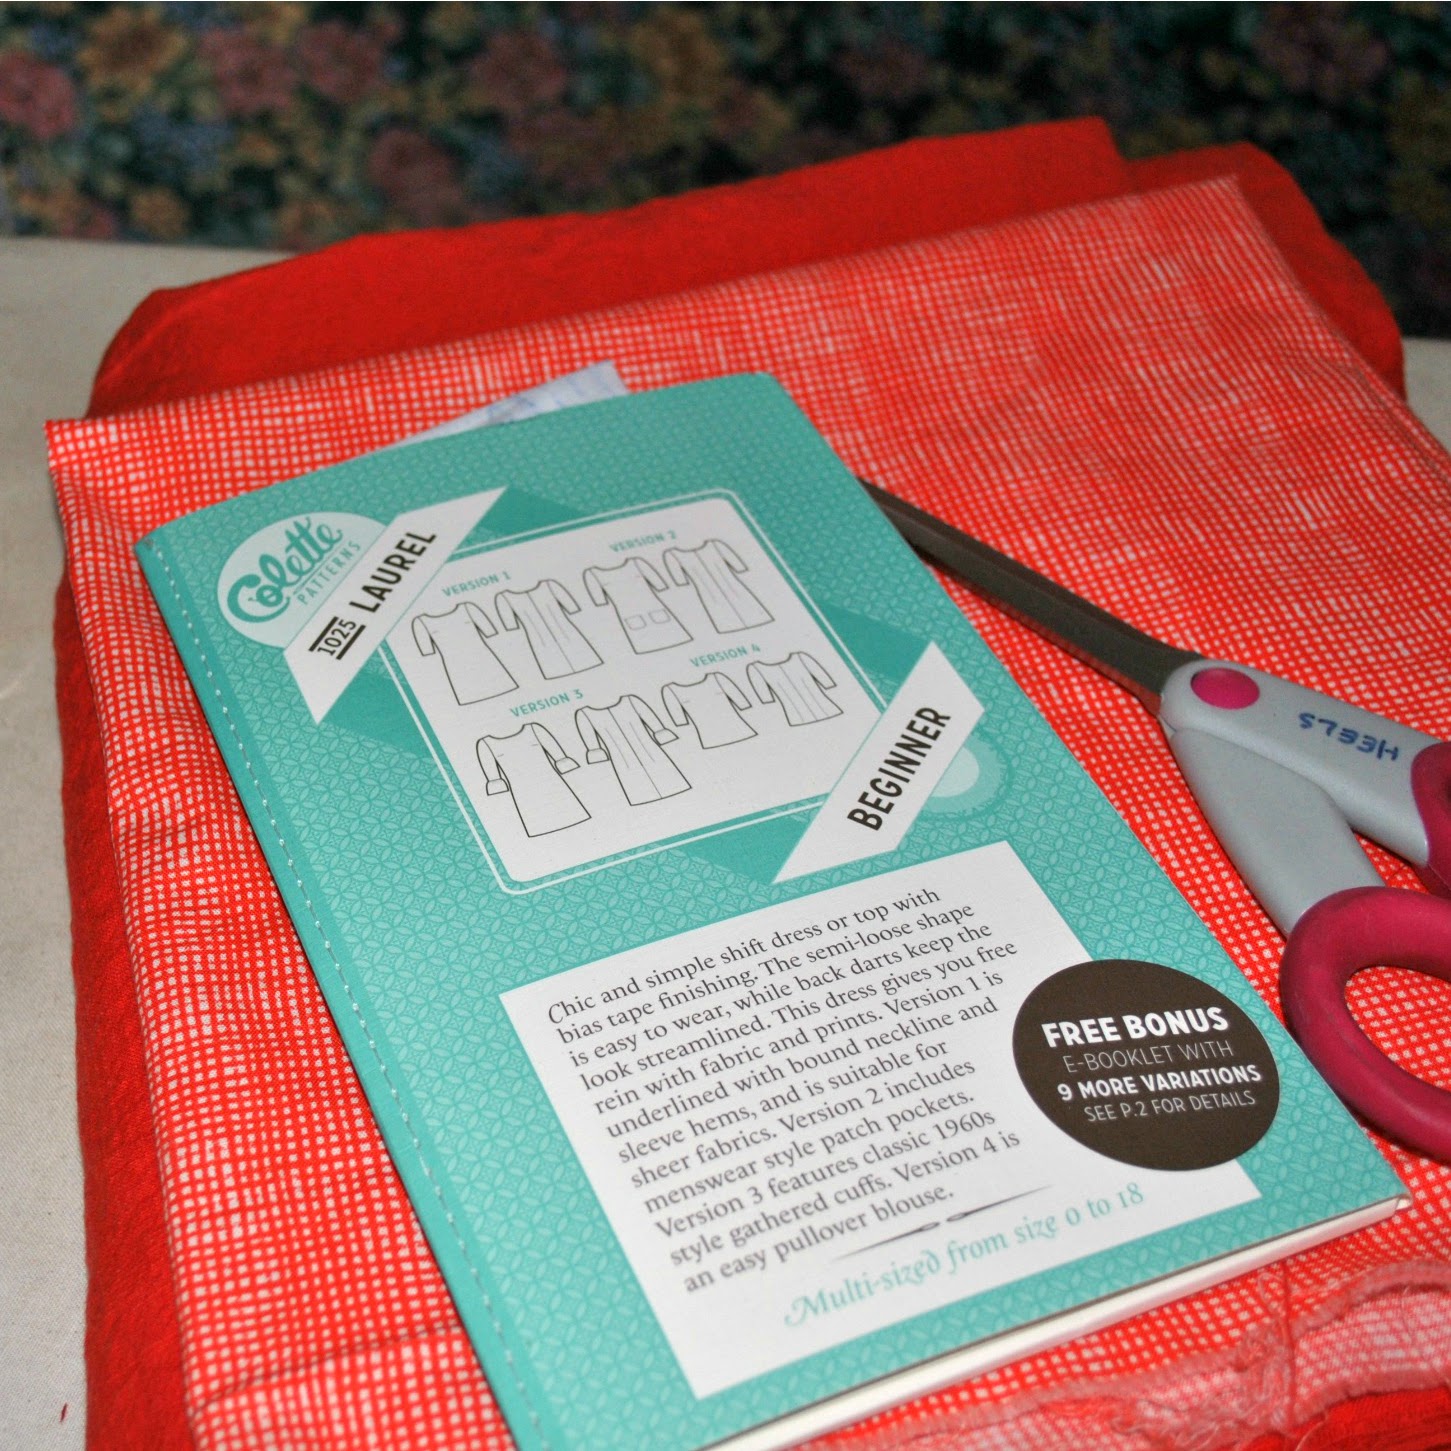
I've been slowly plugging away at my triangle quilt this week, averaging about one row per night.  I'm on row 9 of 19 at the moment so I am making good progress.  I'm really hoping I can spend a day sewing this weekend and get the whole top pulled together.

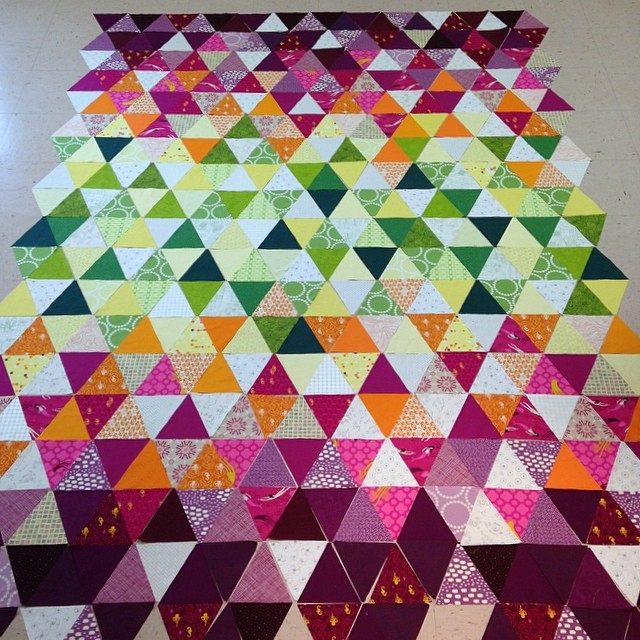
I'm also so excited because Jeni Baker from In Color Order, featured my very own yet to be named triangle quilt in her weekly favorites round up!  Ahh! Pinch me!  See there it is in position #3  (Thanks so much Jeni!).  I feel so validated and honored to be included in with these very talented ladies!


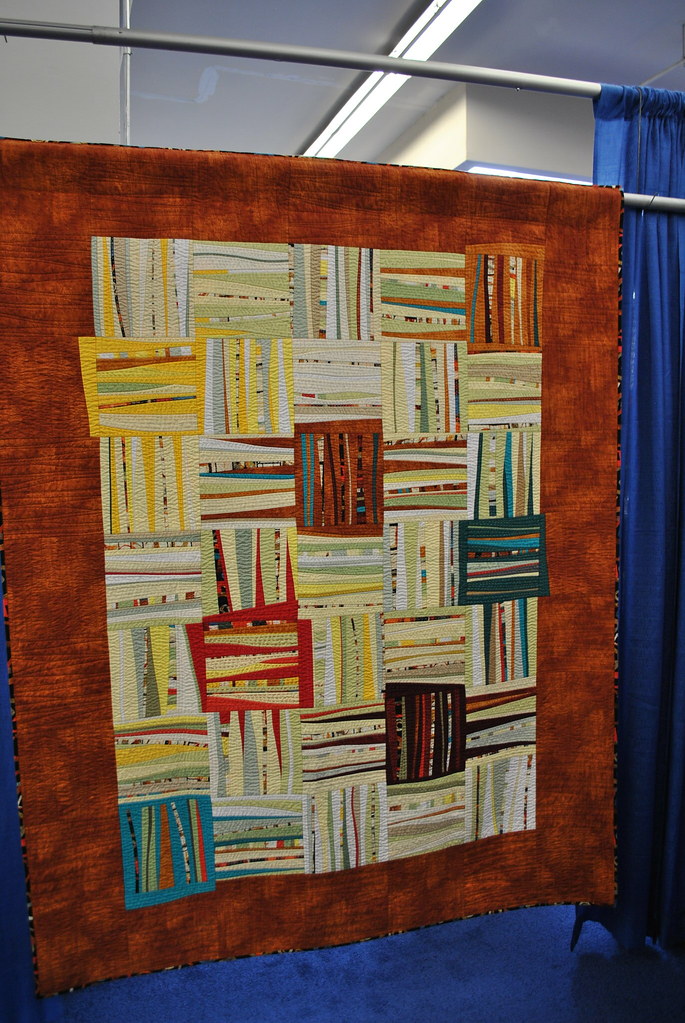
As promised, I'm back with Part 2 of our visit to the Machine Quilters Exposition (MQX) this past weekend.

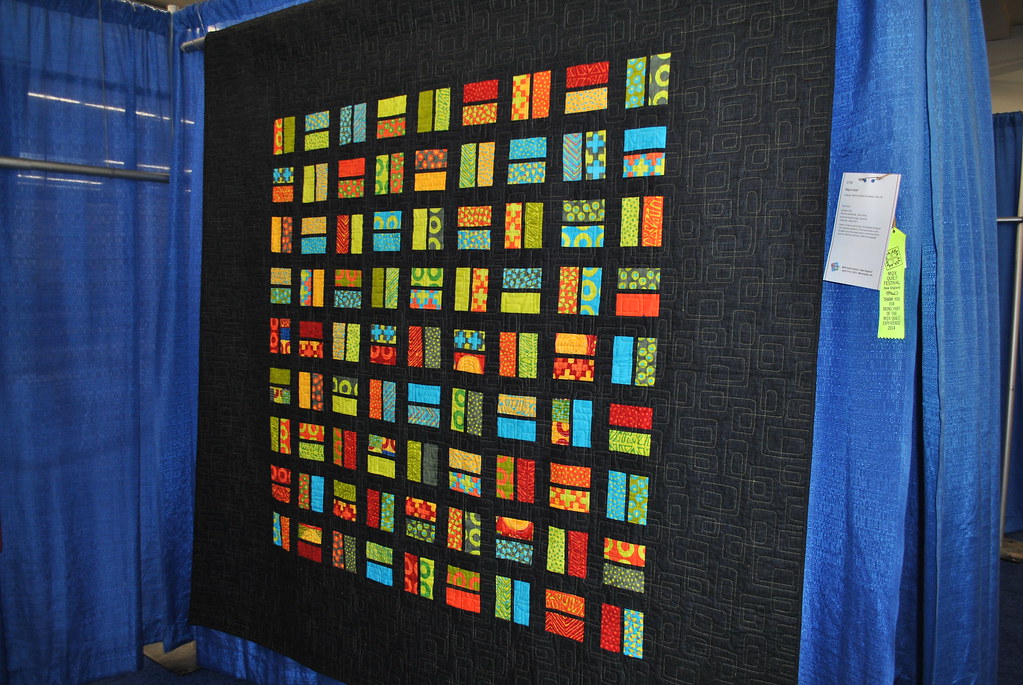
This year was the first time that MQX organizers included a specifically Modern Quilting category.  There weren't many submissions this year, but I'd be willing to bet money on the fact that it's going to grow pretty quickly.

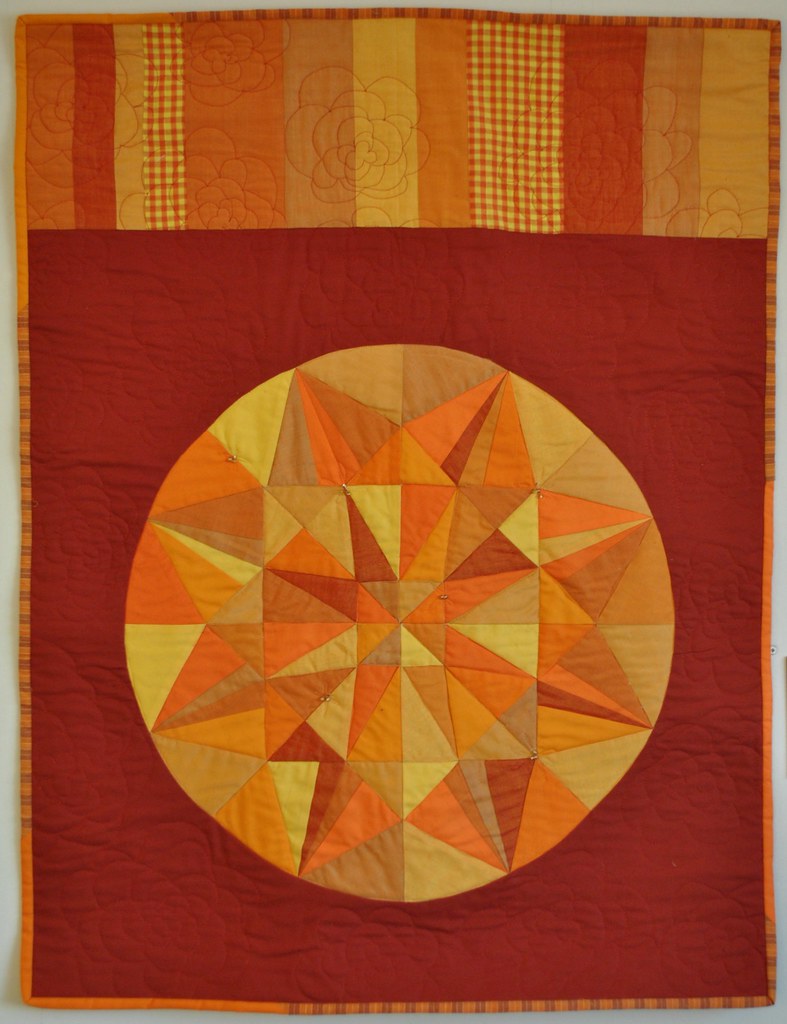
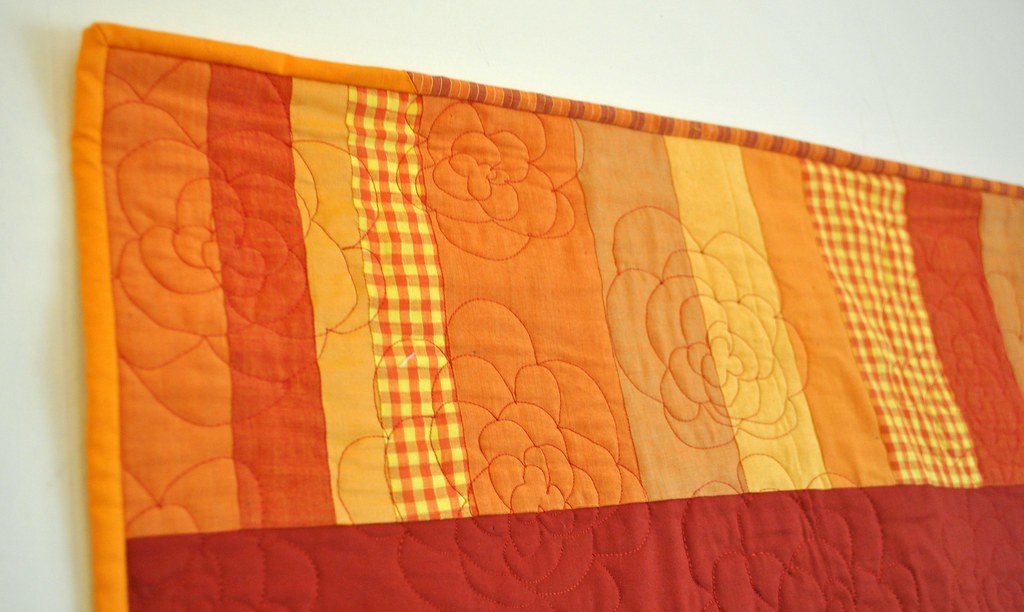
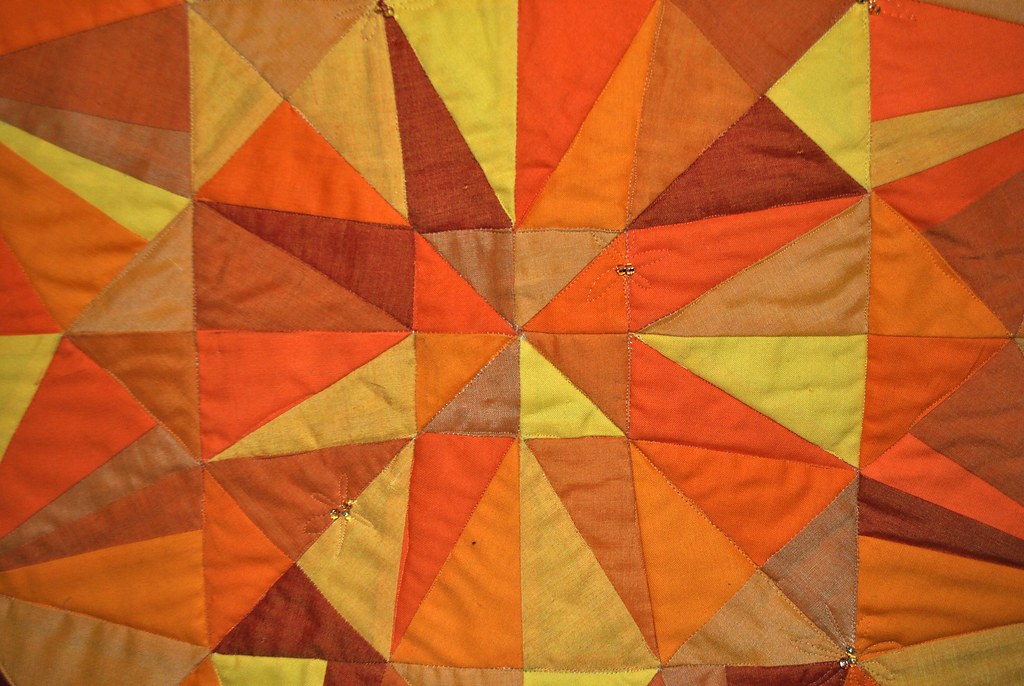
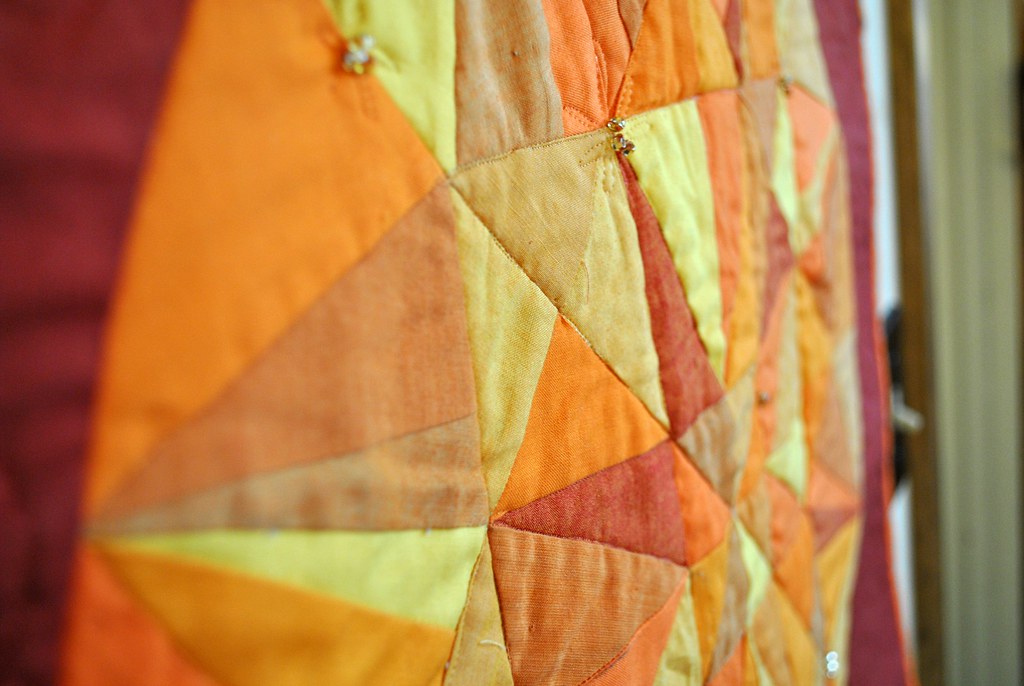
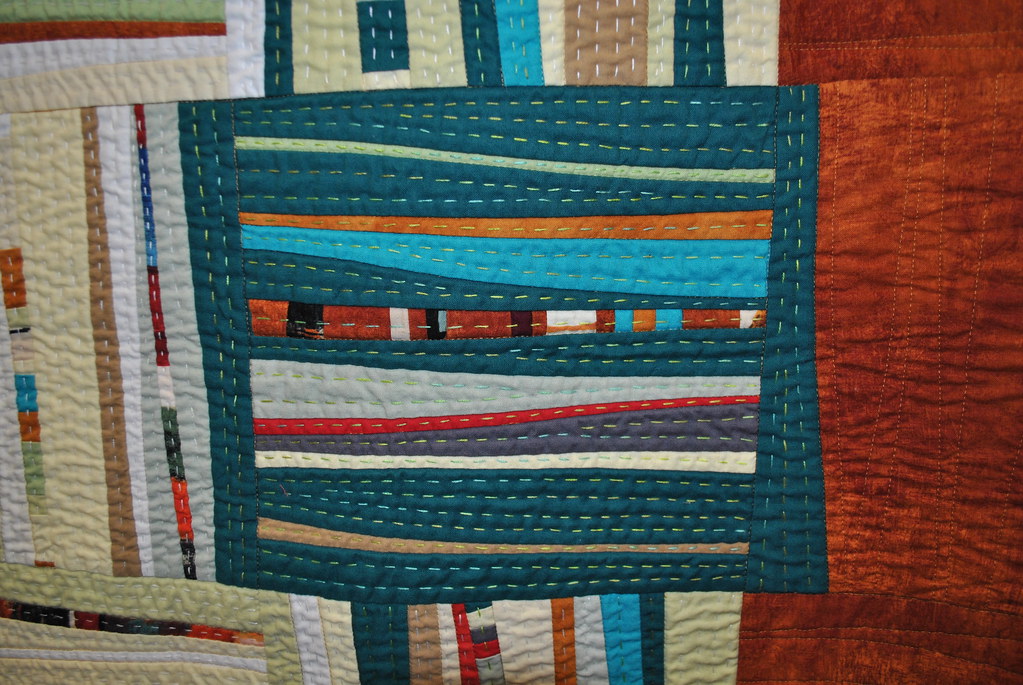
I didn't happen to catch the name of this quilt but I really loved the design and construction of it.  It looks very complicated, but in reality, they are just wonky string blocks, squared up and stitched together.  I really loved how the careful color placement made the blocks look even wonkier than the really are too, even causing some of them to break through the border.  I think this is a method of "modern improv" I could get behind.


And the close up details were fantastic.  Each block was hand quilted along with some detailed machine quilting in the border as well.


Of course I LOVED this Purple and Gold quilt.  If you're wondering why, those are the colors of Saint Michael's College, where I spent four very happy years of my life!  And you know what?  I DO Like Saint Mikes!


I liked the simple pattern of this quilt (in fact, I think I may have picked it up during Vermont Shop Hop weekend).  I also have a nice pile of these same fabrics at home that I've been waiting to cut into.  Originally I was leaning towards some crazy flying geese but I may change my mind now.


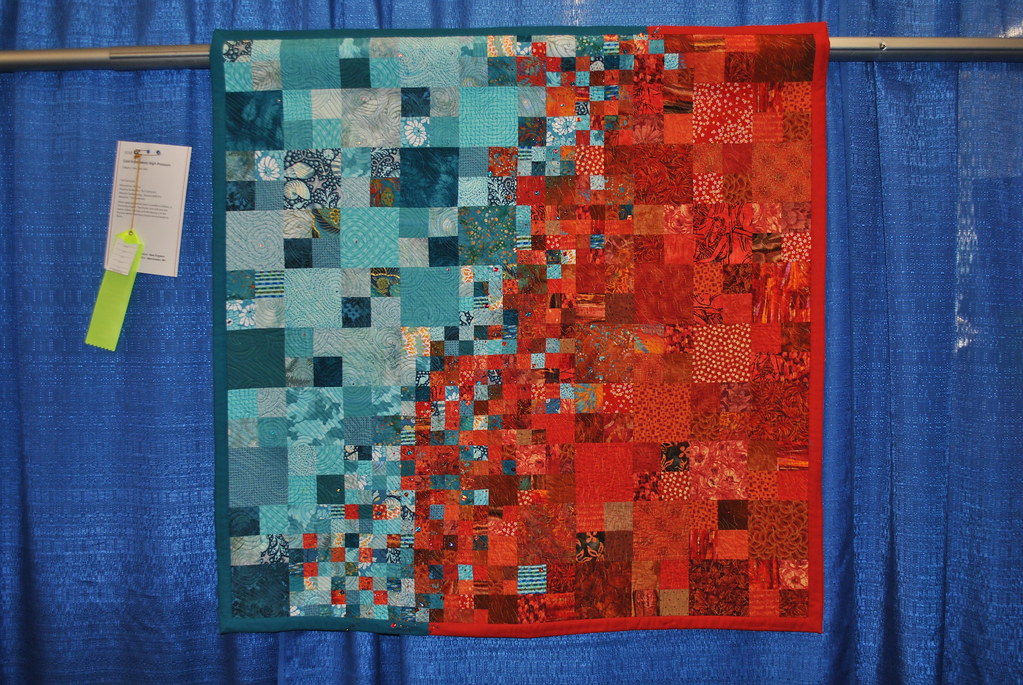
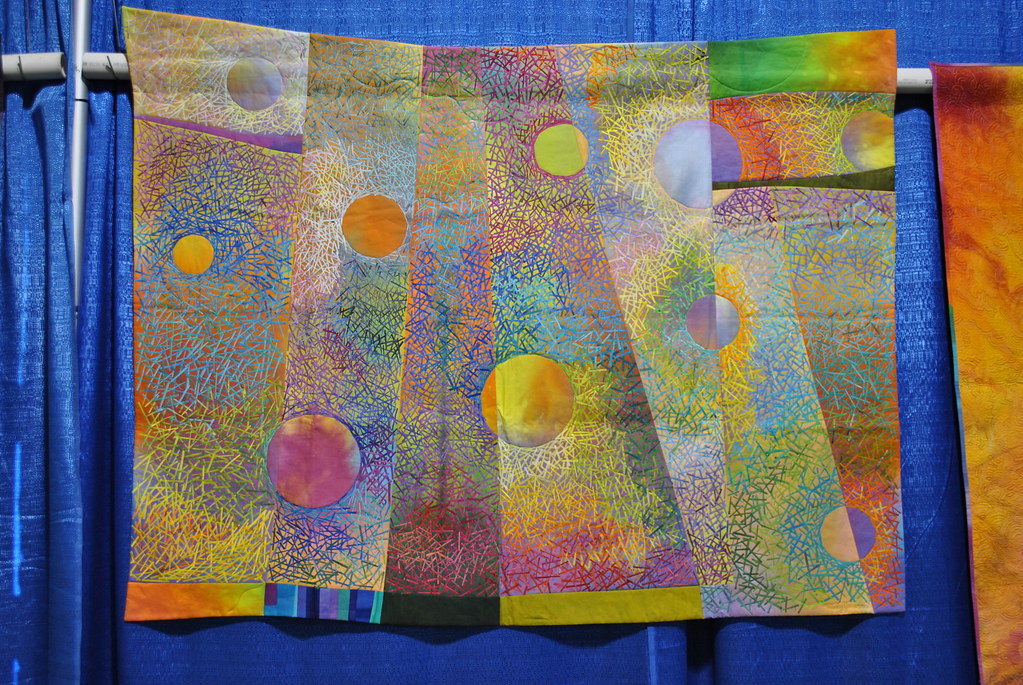
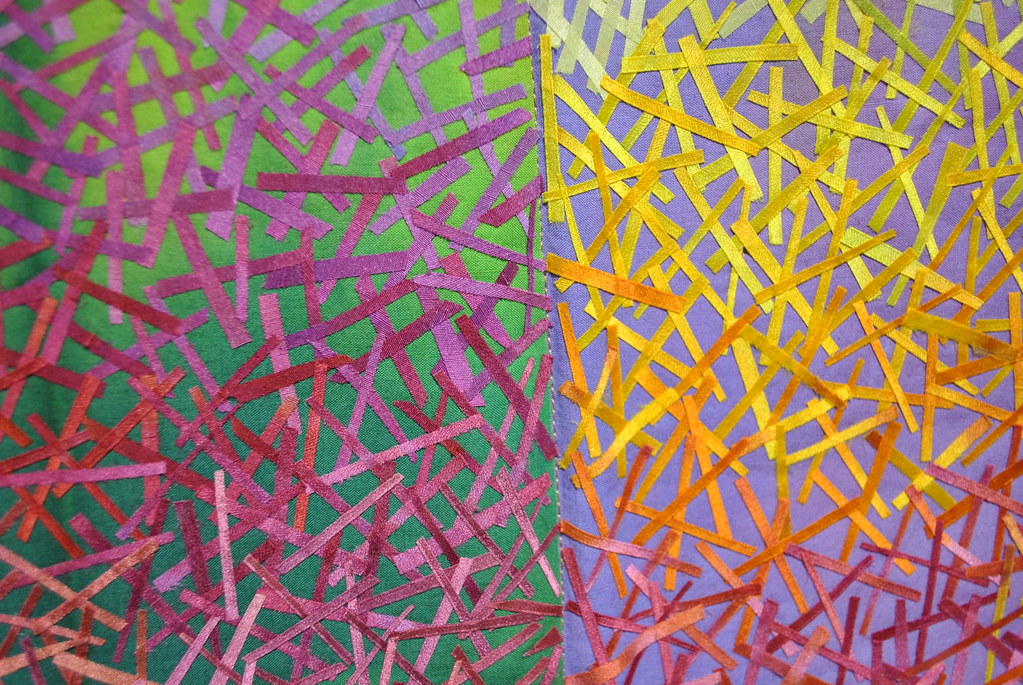
This one was called "Cold Front Meets High Pressure".  I think the maker did a wonderful job of causing the two colors to clash into one another.  Very fun and dynamic.  It's also made with mostly batiks, which I think the modern quilting world tends to shy away from as being too traditional or something, opting instead for bright solids and geometric prints.  But I think this is proof that batiks work just as well for our modern quilts.  What are your thoughts on that subject?


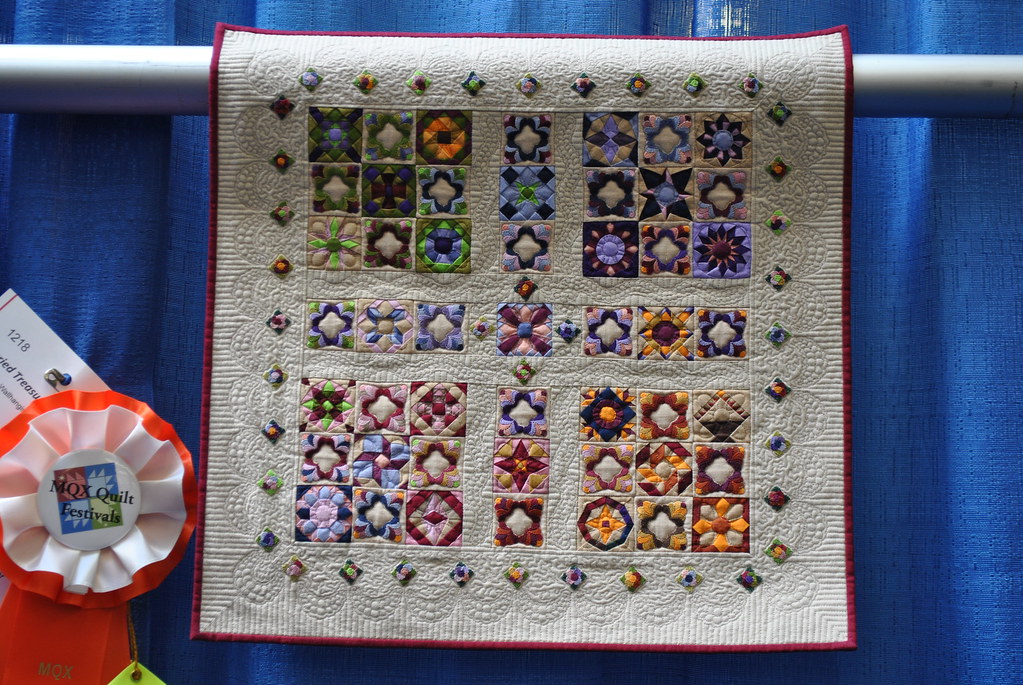
There was some beautiful detailed bead work on this one as well.


I'll leave you with this for now.  There are a few other things from MQX that I wanted to share with you as well.  Stay tuned & Happy Quilting!


Monday, April 14, 2014

Machine Quilters Exposition 2014 - Part 1

As expected, I didn't get much sewing done this weekend, only accomplishing another row of my triangle quilt and some more of my "Waiting Quilt" hexagons that I first posted about way back in January.  I did, however, get to visit the 2014 Machine Quilters Exposition quilt show in Manchester on Saturday with my husband.  I had a great time and he was a good sport about the whole thing.


Since I don't have anything new to share I wanted to share some of my favorites from the show.  For all of the pictures from the quilt show visit my flickr set: MQX 2014.


One of my favorites of the show was this itty-bitty, teeny tiny miniature quilt by Mary Kay Mouton.  I had never heard of her before the show but a quick Google search discovered that Mary Kay teaches a method of paper piecing called "Flip-Flop" piecing.    Her blog describes it as a new paper-piecing system in which a quilter works on not one, but both sides of every foundation.  Hmm... Sounds interesting.  Does anyone have any experience with her technique?

What really blew me away about this quilt was the size of the finished blocks.  They must have been only 1.5" or smaller even still.  Those little rosettes are no bigger than 1/4 inch!


There was also a wonderful display of quilts by Melody Johnson.  Melody's art quilts are one of my first introductions into the world of quilting as a art form.  To this day, I am awed and inspired by her work.  The signage introducing the exhibit had this to say about her:

Melody Johnson is a curious hybrid in the quilt world.  Her quilts look pieced or appliqued but are actually fused.  Viewed from a distance, one of her distinctive quilts might be mistaken for a painting.  Her quilts are full of dazzling colors resulting from her specially hand dyed cottons and silks.  There is a casual feeling to her lines and shapes, sometimes like those found in abstract art (she is also a painter) and sometimes they echo the imagery in nature.  Many have remarked that her quilts 'look happy'.  Ms. Johnson's favored technique is fusing...

Enough words.  Let's get to her amazing quilts.

Distinctive leaf pattern found in Melody's quilts
Loved the giant X this one created
Almost looks like watercolor or pointillism but when views up close....
... they were little tiny match stick strips of fabric
Loved the border on this one.


I'll leave you with this for now.  Be sure to come back for more about the show!  I'm linking up with Stitch by Stich for anything goes mondays.


Wednesday, April 9, 2014

Triangle Quilt Along - Time to Sew

It's week three of the Triangle Quilt Along, hosted by the Sassy Quilter and time to start sewing!  I spent yesterday at a Sit & Sew day with some ladies from my local quilt guild and took advantage of the time (and excessive amounts of floor space) to lay out my blocks.

When I first pulled my fabrics for this quilt I thought I'd go with a random color layout.  When I posted my picture to the Flickr pool someone suggested doing a gradient, from one color to the next and I was like "yeah, that could be kind of cool."  So I tried it.


I started with a blend of my greens and yellows in the middle then slowly radiating out into orange, pink, and finally purple on the outside.  And I love it!


One of the ladies at the Sit & Sew said it reminded her of rainbow sherbet.  I have to say, I kind of agree!


I was able to get all of my rows laid out - 19 in total with 24 pieces per row.  I might add a few more blocks to the width of the strips to square it out but that really depends on how I feel about the dimensions once I get all my rows sewn together.

The sewing was so much easier than I was expecting too.  I was so pleasantly surprised! They went quick once I had a rhythm.  I pieced the blocks into sets of two along the row, then pressed all the seams open.  Then I went back and joined the sets into one long row.  Easy-Peasy.  The hardest part was making sure I was paying attention to which direction the blocks went.  I got 4 rows done and can't wait to finish up the rest later.


I won't be doing any sewing this weekend as the annual Machine Quilters Exposition (MQX) is in town and I've managed to convince my husband that spending the day with me at a quilt show will be a perfect date.  If you're in New England, I definitely recommend this show.  It's amazing!


I'm linking up with this weeks WIP Wednesday over at Freshly Pieced.


Happy Quilting!

Wednesday, April 2, 2014

Triangle Quilt Along - Time to Cut

Thank you so much for the feedback about my two color pulls for the Triangle Quilt Along, hosted by the Sassy Quilter.  I ultimately decided to go with pull #1, adding in some more purples to help round the palette out.  Unfortunately I didn't get a picture of the final fabric pull before I dove into cutting triangles.  I'm using some of my absolute favorite and longest horded fabrics in this quilt.  Particularly some cherished fat quarters of Heather Ross, Mendocino (that's the mermaid fabric that is nearly impossible to find anymore).


Paula put together a great tutorial on how to use these fancy 60 degree rulers.  I've had one on my sewing table for ages (no idea where it came from) but have never used it!  But fear not, you don't need to run out and buy one of these right away to make a triangle quilt.  Paula also showed us how to cut them using the 60 degree line on a regular ruler too.  This was also my first time using starch on my fabrics before cutting, as Paula recommended.  My opinion on the stuff is not yet decided.

diving right in
stack of green triangles
To make a quilt the same size as Paula's I needed to cut 204 triangles.  At first I was like, "wow, that is going to take forever!", then I started cutting and before I knew it I'd cut 419 triangles.  Whoops.  I guess it will be a little bit bigger!
progression of colors

Now the question is: what will I do with all these scraps?  I'm thinking wonky stars!


I'm linking up with this weeks WIP Wednesday over at Freshly Pieced.


Happy Quilting!


Tuesday, April 1, 2014

Never Just Jennifer - Now on Facebook


Never Just Jennifer, now has a Facebook page!  
Hope over to visit and stay up to date with the blog!


Happy Quilting!

Adventures in Non-Quilting

This past Saturday I had the pleasure of attending a dress making class at Nido Fabric Shop in Burlington, VT.  My friend Megan and I decided to sign up for a class together.  We ultimately decided to try the Laurel Dress by Colette Patterns.  The site says this about the dress:
This chic and simple shift dress is easy to sew, astoundingly versatile, and comfortable to wear year-round.
I decided to go with a simple red-orange quilters linen by Robert Kaufman and a pretty red and white cross hatch for the bias tape edges.


This was my first attempt at sewing clothing so I was really nervous to start cutting the pattern and fabrics but eventually sucked it up and dove in.  It was simpler than I thought and the pattern was really simple to cut which really helped.

time to dive in!
laying out the pattern pieces before class
We sewed non-stop from 9am to 2pm and both had nearly completed dresses!  It was great leaving with an almost ready-to-wear dress!  Megan used a beautiful vintage-esque Liberty of London print.

Megan was all smiles!

sewing the final seam on my dress

I was so excited that I had to try it on before we left the shop.  I need to take it in a bit around the waist to make it a little more fitted/flattering and then finish sewing on the bias tape at the neck and hem the bottom.  But I'm so excited to get to wear my finished dress!  I think when I made it again I will shorten the sleeves just a bit and enlarge the neck line to be more of a scoop neck than a crew neck (I just feel that it's more flattering on my body type).  But I couldn't be happier with my first attempt at three-dimensional sewing!

my nearly complete dress

Happy Quilting!